πRo-Bot: Autonomous Fire-Fighting Turret
Lead Programmer · Team of 4 · ME 102B capstone · UC Berkeley · Jan – May 2025
A turret that spots a fire with a thermal camera, aims itself, and sprays water until the heat is gone. I designed its chassis and electronics, wrote its code, and built it.
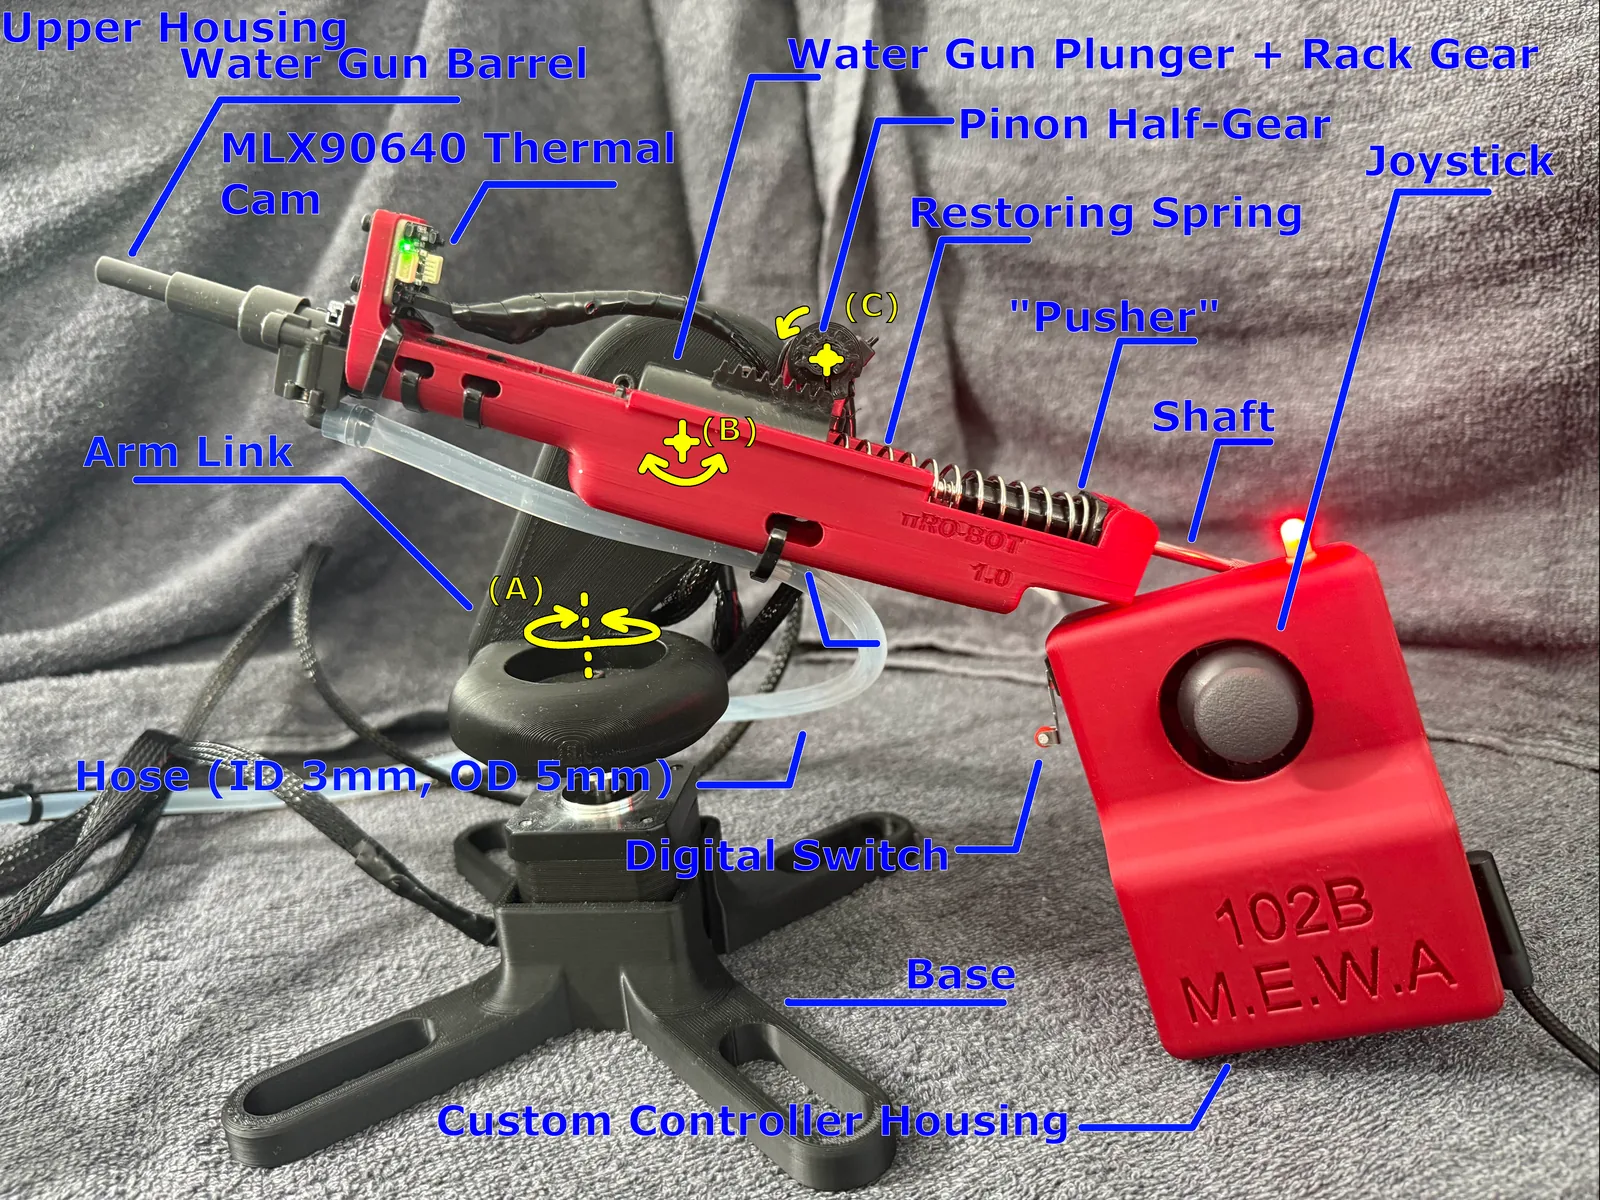
2.5
degrees of freedom: pan, tilt, and a firing stroke
768
pixel thermal camera, streamed at 8 Hz
$237
total bill of materials for the whole build
6 m
goal range, possible in manual mode
What I did
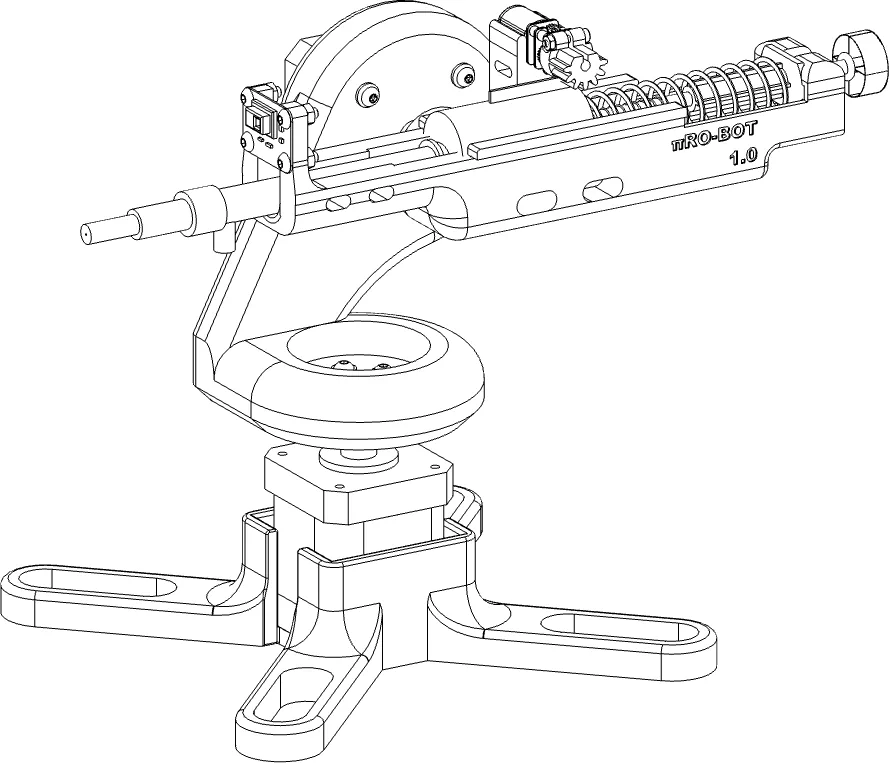
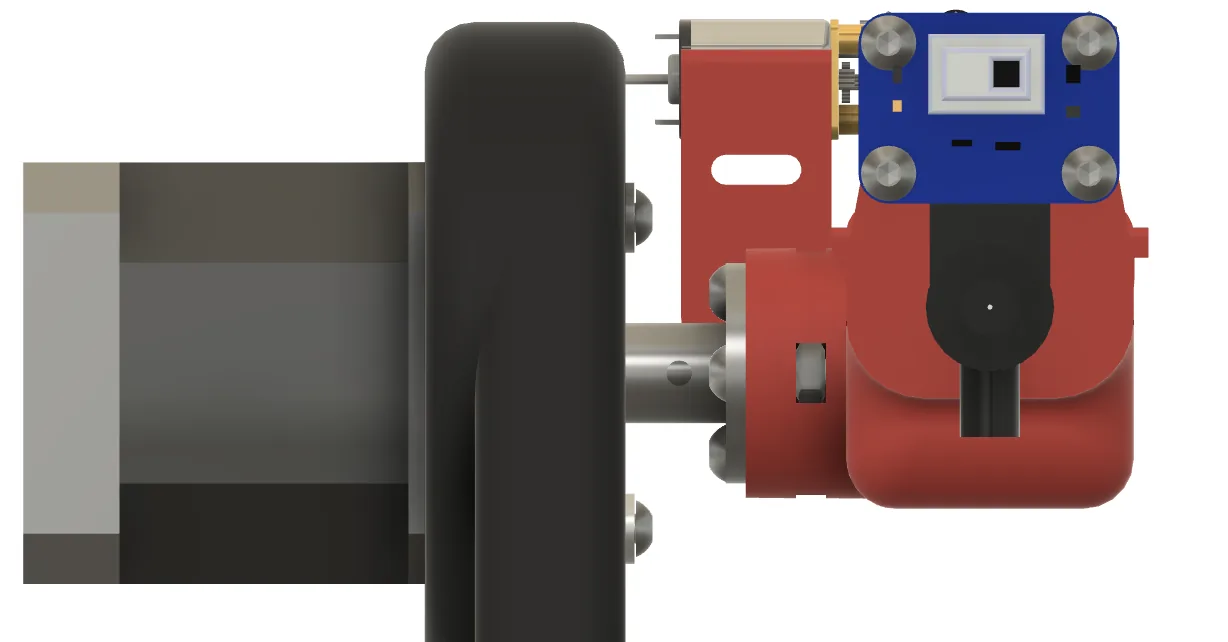
- Designed the robot's chassis in Fusion 360 and built a full CAD model of the assembly, including the water gun's internal firing mechanism.
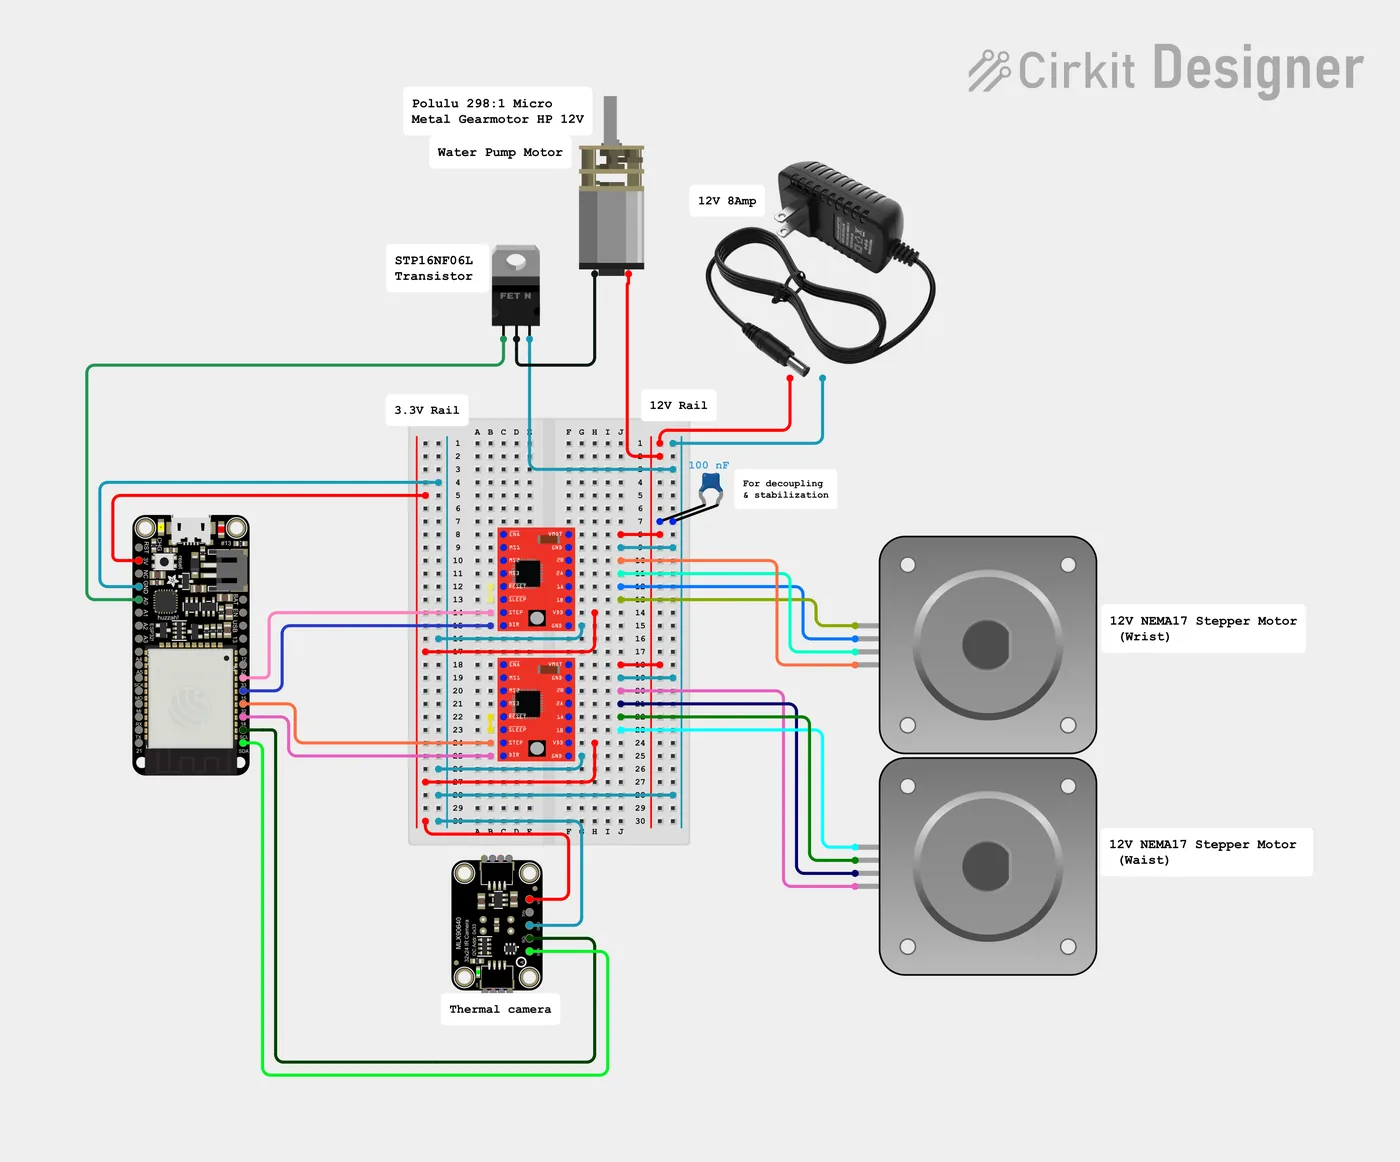
- Designed the electrical system: power, wiring harnesses, two ESP32 microcontrollers, the thermal camera, stepper drivers, and the firing motor circuit.
- Wrote the C++ firmware that reads the thermal camera, streams it wirelessly to the controller, aims the turret, and fires.
- Built and assembled the whole robot, wiring harnesses included.
- Debugged the thermal sensor and stepper control through many firmware versions until the turret aimed and fired the way it should.
The hard part
Reading and calibrating the thermal sensor was tough, and I was new to NEMA 17 stepper control. The firmware took a lot of versions before the robot aimed and fired the way it should.
How it turned out
The turret detects heat, aims, and fires on its own, and an operator can take over with a wireless joystick. In manual mode a skilled operator can reach the full 6 m range. Autonomous mode reached about half of it, limited by the thermal camera's resolution.
Demo
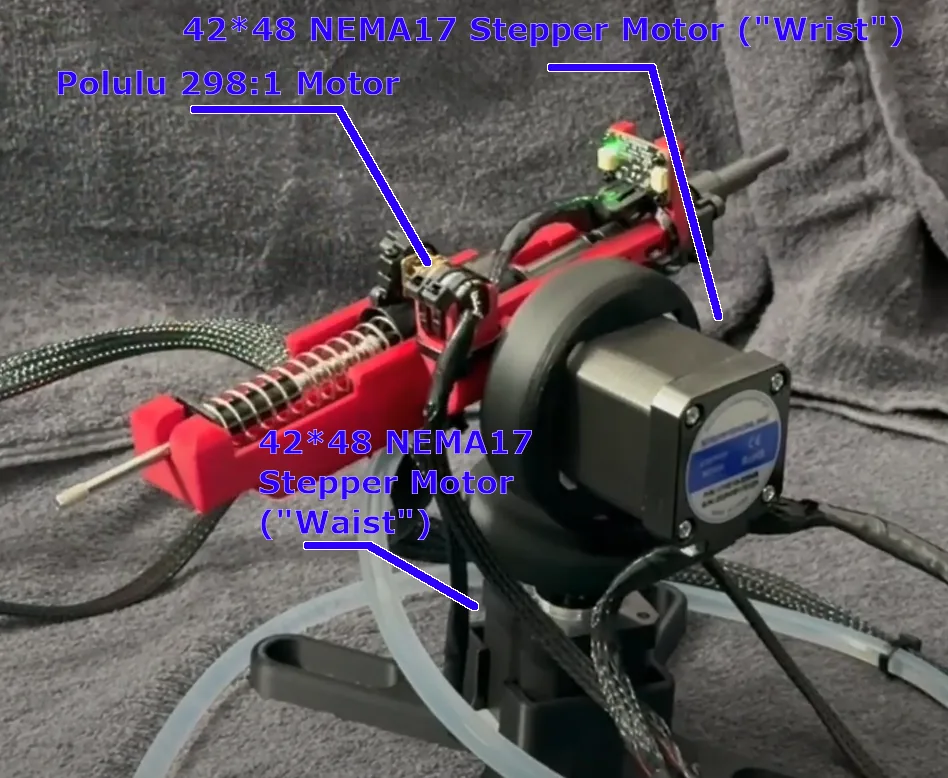
Hardware and CAD
Engineering detail
The full story for anyone who wants to dig in: design decisions, numbers, and what didn't work.
How it works
The turret has three modes. In autonomous mode it patrols, sweeping its field of view with an infrared camera. When the camera sees a thermal signature above the threshold, it works out where the heat is, aims at it, and fires until the signature drops back down. In manual mode, a person takes over with the wireless joystick controller to aim and fire by hand. A preventive mode sprays retardant in a set pattern on a schedule for high-risk zones.
The mechanism has two joints and a transmission: a waist joint for yaw, a wrist joint for pitch, and the firing stroke. That is why the report counts it as 2.5 degrees of freedom.
Design decisions
| Choice | Why | Check |
|---|---|---|
| NEMA 17 steppers for pan and tilt | Steppers rotate continuously and have some built-in compliance, which is safer around a human operator than a servo. | Applied torque from CAD is 8.64 N·cm against a 55 N·cm holding torque, about a 6× margin. Axial load is 6.54 N against a 10 N rating. |
| Pololu 298:1 gear motor for firing | The toy water gun used a big gear reduction. A compact high-torque motor let us replace it with a direct drive in far less volume. | Rated about 196 N·mm at roughly 60 RPM, versus about 20 N·mm for the stock toy motor. |
| MOSFET driver for the firing motor | Lets the small motor run from the same supply as the steppers with simple circuitry. | A MOSFET and a capacitor in place of a full motor driver. |
| PLA at about 15% infill | Fast, cheap printing meant more design iterations. | Printed coupons were test-broken by hand before committing to the infill. |
| Metal flanged shaft couplers | Keeps metal-to-metal contact between each stepper shaft and its printed link. | Metal at every motor-shaft joint. |
Electronics and firmware
Two ESP32 boards talk to each other over ESP-NOW, a direct peer-to-peer radio link that needs no router. The turret board reads the 24×32 thermal camera (768 pixels, 8 Hz) and sends each frame to the controller in 60-pixel chunks, since a full frame is too large for one packet. The controller reassembles the chunks and checks that every piece arrived before using the frame.
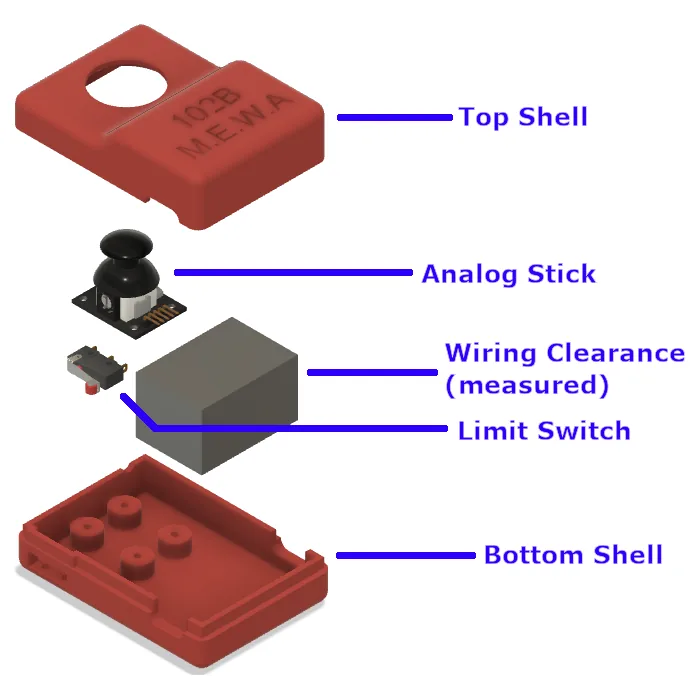
On the controller side, the joystick is scaled to ±1000 with a dead zone so it doesn't drift, the trigger is a limit switch, and the mode button uses an interrupt with a hardware-timer debounce so one press registers once. On the turret, a trigger pulse starts the firing motor at a fixed PWM duty and stops it after one counted stroke of the plunger.
Both the turret and the remote are written as state machines, and the report documents each with a state-transition diagram.
Results against our goals
| Goal | Outcome |
|---|---|
| Fire a stream of water up to 6 m, accurately | Possible in manual mode with a skilled operator |
| Working automatic and manual modes | Both working |
| Detect heat, aim, and fire until the fire is out | Works autonomously, but reaches about half the 6 m goal, limited by the thermal camera's resolution |
| Smooth handoff from automatic to manual | Working, using the wireless controller |
The whole robot cost $237.35 in parts, and much of it was off-the-shelf: a toy water gun, a stepper kit, and a $75 thermal camera. Our advice to future teams was to use off-the-shelf parts wherever possible and hold frequent team syncs. If I could go further, I would move the remote from a local radio link to Wi-Fi so an operator could run it from anywhere, and upgrade to a higher-resolution thermal camera.